I have always loved the traditional type of decorations such
as holly wreathes and ivy and holly swags at Christmas time, balloons, candles
and bunting. Yes, I love bunting; it always looks so festive and colourful and
always reminds me of carnivals and fairs frequented in my younger days. Of
course it has now become very fashionable and it’s to be seen everywhere in
shops, magazines and on card and scrapbook designs. The only draw back to this
move into the sphere of the fashionable is that although now more widely
available it is also more expensive and if I am to be honest rather tatty. Some
of the examples you see in the shops leave a lot to be desired, with odd
colours and very poor workmanship,
In view of this I decided to make my own. My first attempt
was using paper and card to make bunting for my daughter's 'Mad Hatters Tea
Party’ she had for her 18th. Well nothing was commercially available
so I had no alternative but to make my own.
 |
| Handmade printed card bunting |
My next hand at making bunting was the following Christmas
when I made some to decorate the house. I thought of using paper again but
decided this was less durable and would really be a one year use product which
is not particularly environmental. Having seen the large quantity of Christmas
fabrics that were available I decided this was the way to go. I first tried
simply cutting the pennants out using pinking shears but felt this gave an
unfinished look (exactly as I had seen in many of the retail outlets). I wanted
something altogether smarter neater and finished. I therefore decided to cut
out the pennants and then sew them together and finally then secure them to a
chord or thread.
 |
| The Christmas bunting here is intertwinned with holly and berries |
Having made the bunting for Christmas the idea took off: my
daughter wanted some to decorate her rooms at University and her room at home
and friends wanted me to make them bunting for next Christmas. I realised you
could make bunting for any celebration, birthdays, wedding anniversaries,
Valentines Day, Easter, Halloween, birth of a baby, new job, sorry you’re
leaving …… Well the list is endless,
This year I am making some Valentines Day bunting, well I
thought I’d surprise my husband. I thought perhaps other might be interested in
making some as well. To this end I have drawn up this step by step set of
instructions
Making bunting
- Select
the fabrics you like, but bear in mind large patterns are not ideal unless
you want huge bunting. Also ensure any image is the correct way up on
bunting. For example with this Valentines bunting you want all your hearts
the correct way up.
 |
| Assorted fabric and bias binding for Valentines bunting |
- Purchase
bias binding in appropriate colour to coordinate with fabric. Ensure you
purchase the wide bias binding as this will make finishing off the bunting
neater. Quantity/ length of bias required will be dependant on how long
you want your finished bunting to be. Remember to give yourself sufficient
excess to allow for ties to secure bunting
 |
| Picture to show the bias binding |
- Decide
on the size of the bunting you want then create a template. This can be
cut out of strong thick card or plastic. I have used clear plastic because
it is durable and I make a lot of bunting; it also allows me to see
through it and centre the pennant over images on the fabric.
 |
| This shows the plastic template |
- Place template on
fabric and draw around using pen, pencil or tailors chalk. Remember to
keep images orientated so the tops are at the top of the finished
pennant/bunting
- Cut
out the pennants
 |
| Please note how the hearts are facing the correct way for the pennants |
- Take
two pennants and place them with their right sides facing and sew together
wrong side facing. Sew all sides leaving the top of the pennant open. Seam
allowance should be about ½ cm or slightly less. You might find it easier
to pin and tack to ensure pieces do not move when sewing. I’m afraid I do
not usually bother.
 |
| Note how fabric has wrong facing and is pinned |
 |
| Tacking is optional but if making bunting for the first time it might be better to use tacking stitches |
 |
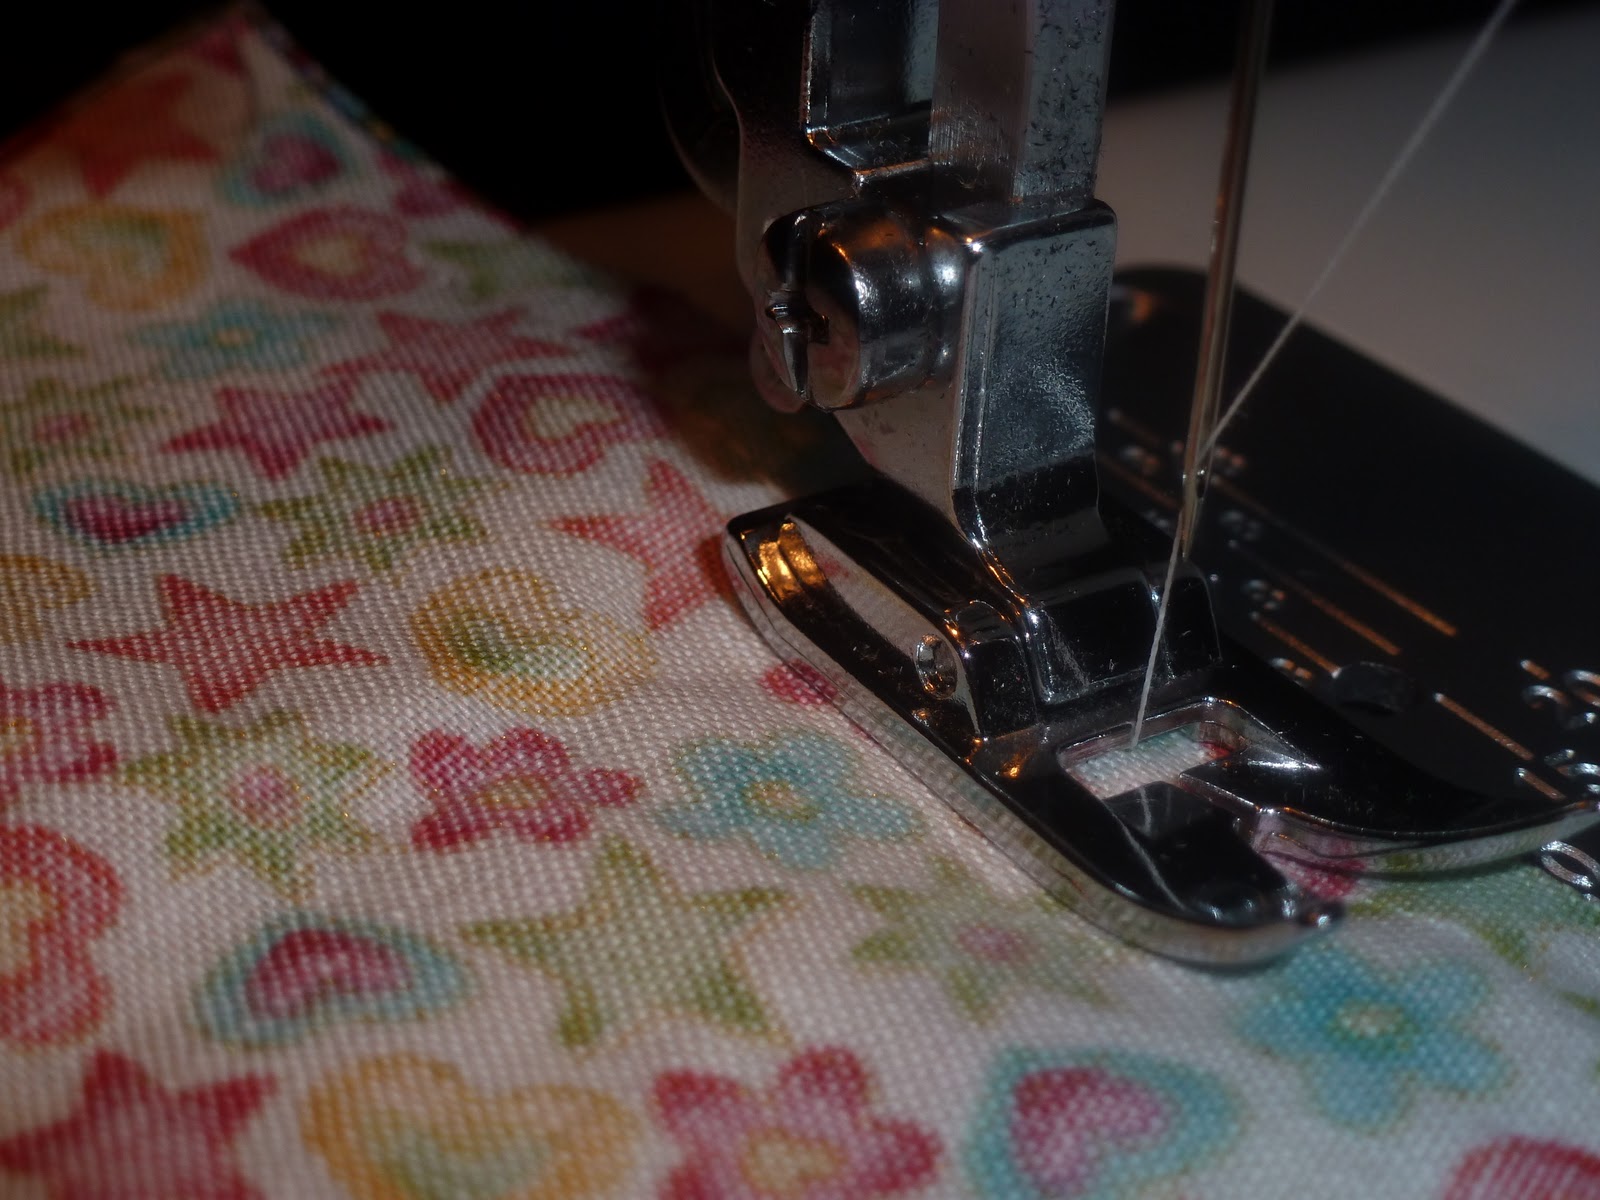
| Machine stitching makes for a neater finish but can be sewn by hand. |
- Once
all pennants are sewn together then turn each one inside out to show the
right side of the fabric. Take care to ensure the pennant is carefully
turned and the triangular shape is retained.
- Press
each pennant individually with an iron
- Decide
the order of the pennants and the distances you want between each
pennant.
- Open
the bias binding and then secure each pennant to the bias with pins,
 |
| Note how pennant is inserted into the bias binding |
- Fold
bias over the top of the pennants to ensure all the un-sewn ends of each
pennant are secured within the bias as shown then tack securely
- Sew
with machine along whole length of bunting to ensure the bias is neatly
closed and the bunting is secure.
 |
| Finished bunting ready for machine sewing |
|
As the old Blue Peter phrase used to go here is some I made earlier.
 |
| Bunting in my daughters room |


This is really good!!! Make me some yes?? haha xxx
ReplyDeleteWell as a matter of fact..........
ReplyDelete